1 . Introduction
2 . My Setup
3 . What is gowitness?
4 . Why use gowitness?
5 . How to use gowitness?
6 . Summary
This post is designed to introduce you to the tool gowitness.

1. Introduction
Welcome to the fifty-ninth blog post of 100 tools in 100 days.
Find gowitness @ GitHub here.
gowitness was created by SensePost an ethical hacking team at Orange Cyberdefense find them at:
sensepost.com
twitter
GitHub
2. My Setup
For running the gowitness tool, I used Kali Linux in a VMware Workstation 16 Player virtualized environment.
3. What is gowitness?
Gowitness is a website screenshot tool that was written by the SensePost team at Orange Cyberdefense.
4. Why use gowitness?
Gowitness can take screenshots, and gather response headers, network logs, security information, and all html from a various inputs such as URL, cidr range, nmap file, nessus file and more.
Gowitness also offers a self hosted database and local website to access this information quickly.
5. How to use gowitness?
To use gowitness you must have Golang installed on your device. Check which version of Golang you have by entering go version into your command line.
Install gowitness easily using the install option from go.
Step 1:

go install github.com/sensepost/gowitness@latest
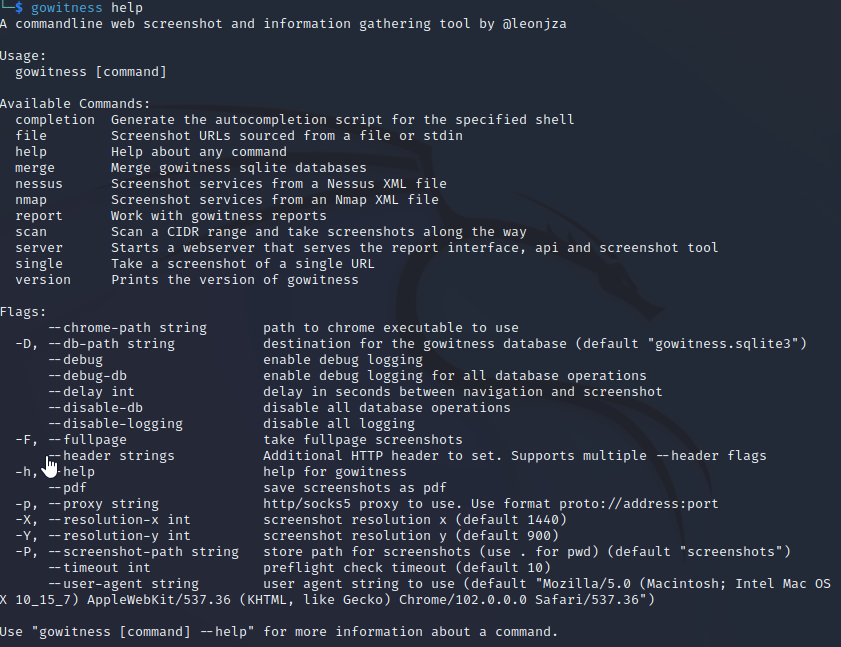
Verify your installation by checking the gowitness help file:
Next, try using the single option to screenshot a website of your choice. I chose to work with the scanme subdomain from nmap.org.
Step 3:

gowitness single http://scanme.nmap.org

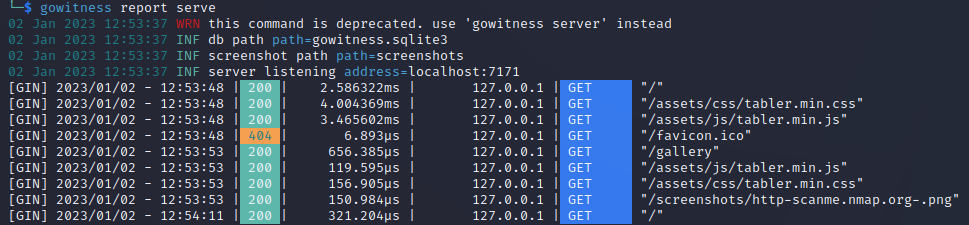
Now that you have captured the screenshot and data for your website of choice, start the gowitness server to access the web interface for interacting with the data.
Step 4:

gowitness report serve
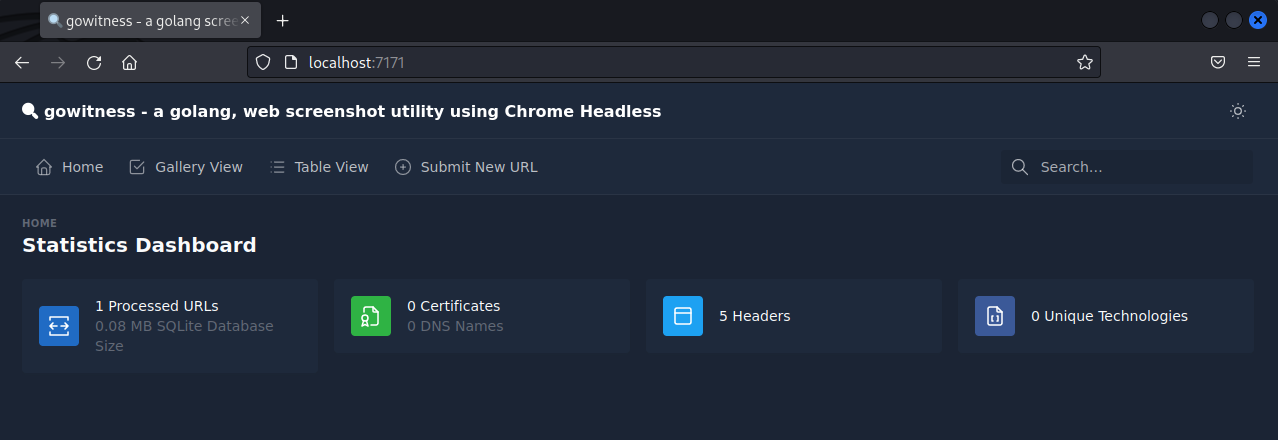
Open your browser of choice and navigate to localhost:7171 and you will see the gowitness report web interface.
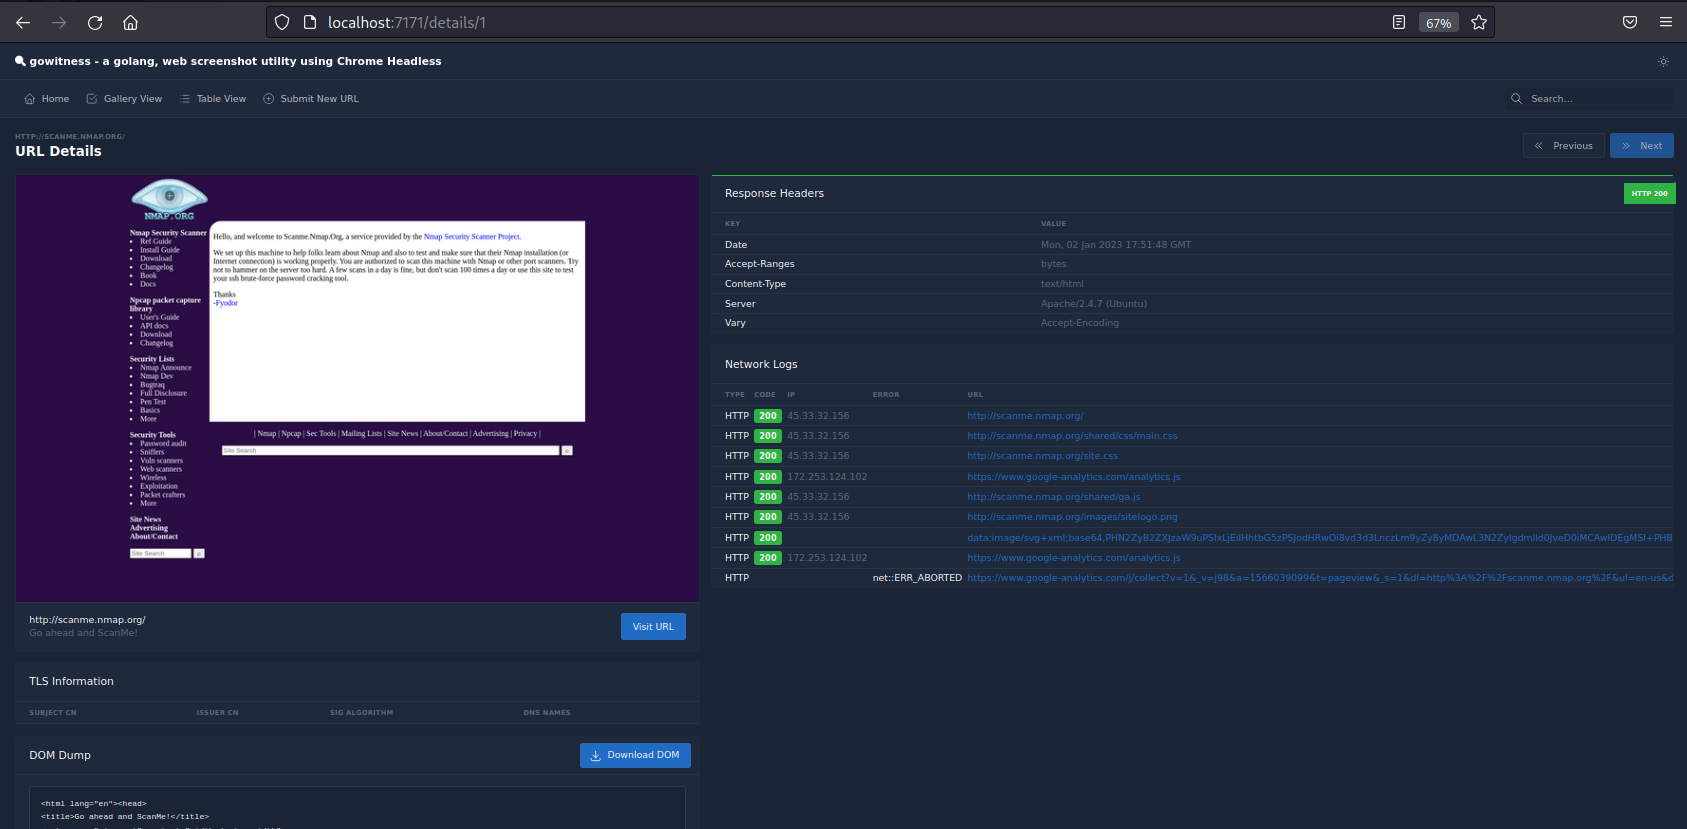
If you click Table View you can see all of the sites you have scanned and open a report detailing the headers, html data, and security information about the url. Click Detail to the left of the site you want to see more information and screenshots of.
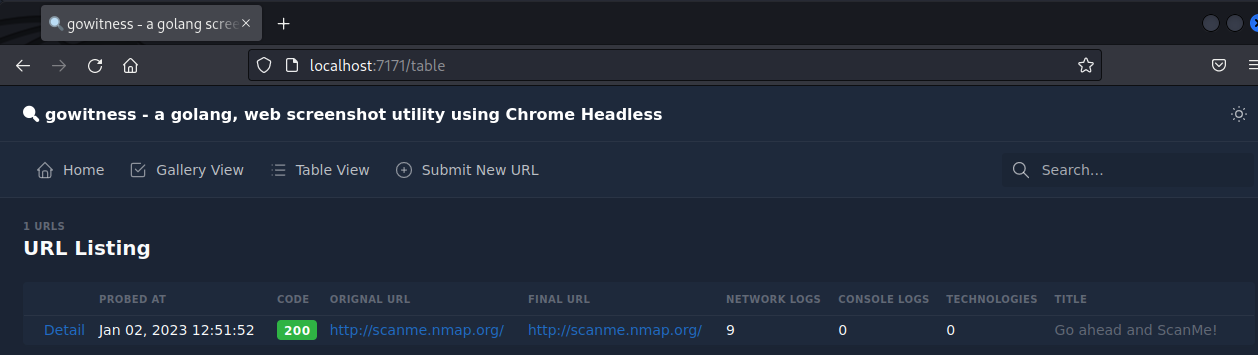
Below is the data captured by my initial scan:
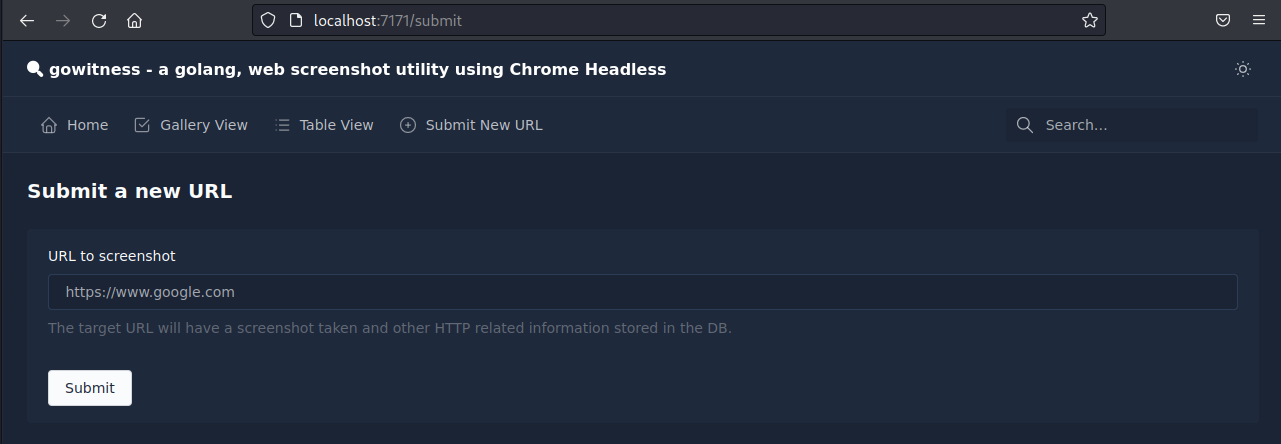
Bonus: you can scan individual URLs on demand from the web interface by navigating to Submit New URL in the banner options at the top of the page.
6. Summary
gowitness is a URL screenshot tool that allows a user to take screenshots of URLs. gowitness captures the headers, security html and additional data from the site specified.
Advanced uses can input nmap and nessus files as sources for gowitness to cover a large amount of sites quickly.
I hope you enjoyed this blog post.
Thanks for reading!
If you have suggestions for what tool to cover next, contact me!