1 . Introduction
2 . My Setup
3 . What is tmpmail?
4 . Why use tmpmail?
5 . How to use tmpmail?
6 . Summary
This post is designed to introduce you to the tool tmpmail.

1. Introduction
Welcome to the forty-second blog post of 100 tools in 100 days.
Find tmpmail @ GitHub here.
tmpmail was created by Siddharth Dushantha and you can find his respective sites below:
GitHub
LinkedIn
Medium
2. My Setup
For running the tmpmail tool, I used Kali Linux in a VMware Workstation 16 Player virtualized environment.
3. What is tmpmail?
tmpmail is a command line based temporary email tool which allows the generation of a random or defined email address for temporary use.
4. Why use tmpmail?
During website testing often a security researcher has to test login features and design for vulnerabilities. tmpmail offers a quick command line option for creating random email addresses to use for this process.
Penetration testers may test various functions of a target and require temporary email addresses just for testing.
tmpmail currently uses 9 different temporary email providers for generating email accounts:
- 1secmail.com
- 1secmail.org
- 1secmail.net
- wwjmp.com
- esiix.com
- oosln.com
- vddaz.com
- bheps.com
- dcctb.com
5. How to use tmpmail?
Installing tmpmail is easy but does require 2 additional dependencies and some extra steps to place the executable in your bin folder.
First, we will get tmpmail downloaded and moved to your bin folder and then I will show you how to get the two required dependencies.
Note: I am using Kali Linux so my commands may differ from yours if you are using an alternative operating system or distribution.
Step 1:
First, download the file and give it executable permissions:
curl -L "https://raw.githubusercontent.com/sdushantha/tmpmail/master/tmpmail" > tmpmail && chmod +x tmpmail

Step 2:
Next, move the executable from its downloaded location to your $PATH,
for me that is /usr/bin/. You may have to use sudo if you are not root.

Step 3:
Next, ensure you can run tmpmail as a command by entering the following command:
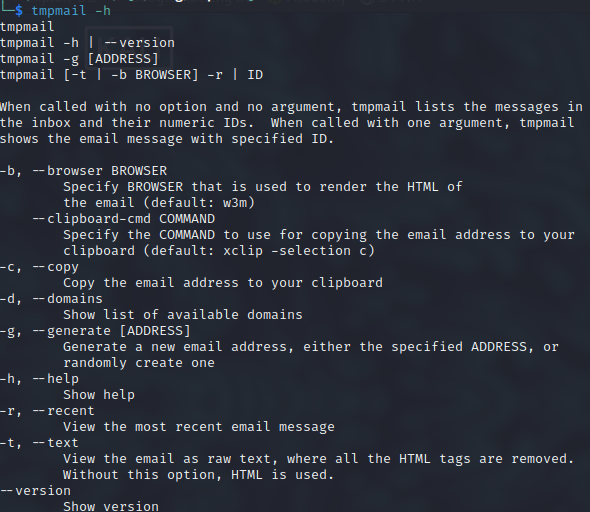
tmpmail -h
If you see the missing dependencies continue to step 4 or move on to step 5.

Step 4:
Install the missing dependencies by entering the following command:

sudo apt-get install xclip w3m

Step 5:
Now run the tmpmail help command again to see if tmpmail is full functioning:

tmpmail -h
Step 6:
The first step in using tmpmail is generating a temporary email, enter
the following command (I created a random one):

tmpmail -g

Step 7:
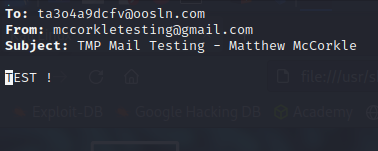
Next, I tested the random address and sent it an email from a
test account I set up for this series.
Step 8:
To view the inbox enter the following command:

tmpmail

Step 9:
To view the most recent email enter the following command:

tmpmail -r

To exit w3m type q and then y so: q -> y
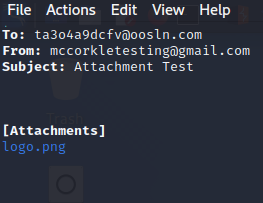
This will open the email in the w3m reader. You can navigate the reader using arrow keys. W3m displays the email using HTML but does not display your attachment (only lists it).
To exit w3m type q and then y so: q -> y
Step 10:
To view a specific email enter the email identification number after the
command tmpmail (the email identification number is the number that
appears in the tmpmail command left of each email listed):

tmpmail 123456789
Step 11:
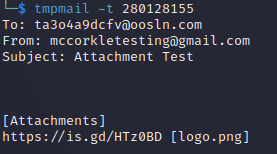
To view a specific email in the terminal as plain text
enter the following command:
tmpmail -t 123456789
Step 12:
To view a specific email in your browser of choice (must know
browser name) enter the following command:
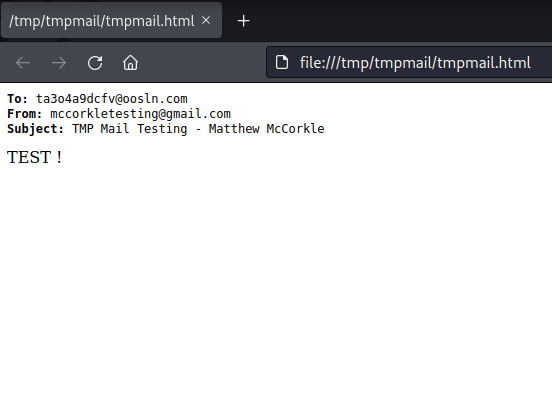
tmpmail -b browsernamehere 123456789

Firefox browser view:
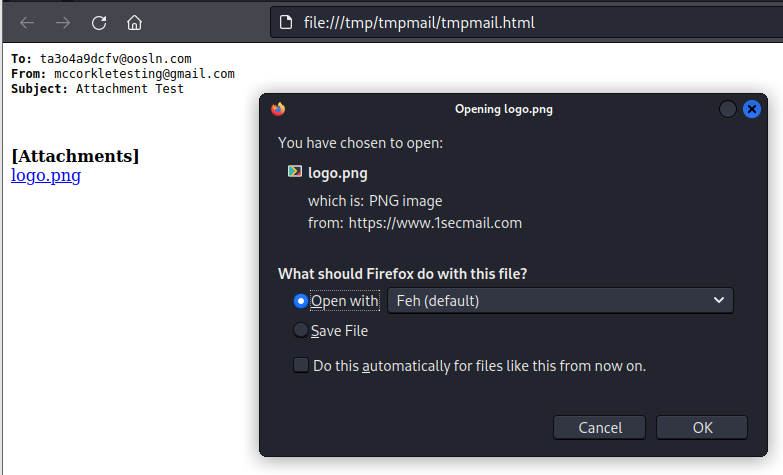
Finally, I wanted to test if the tool could render or retrieve attachments from the temporary mail services and it does. Using the same command in step 12 I opened an email with an attachment and I could then download the attachment as needed.
6. Summary
tmpmail is a great command line tool for accessing temporary email addresses quickly.
tmpmail allows a tester or security researcher to have temporary email addresses at their fingertips without ever leaving the terminal.
I hope you enjoyed this blog post.
Thanks for reading!
If you have suggestions for what tool to cover next, contact me!