1 . Introduction
2 . My Setup
3 . What is BruteShark?
4 . Why use BruteShark?
5 . How to use BruteShark?
6 . Summary
This post is designed to introduce you to the tool BruteShark.

1. Introduction
Welcome to the thirty-eighth blog post of 100 tools in 100 days.
Find BruteShark @ GitHub here.
BruteShark was created by Oded Shimon find him on LinkedIn!
Find Oded Shimon’s blog posts on Medium.
2. My Setup
For running the BruteShark tool, I used Kali Linux in a VMware Workstation 16 Player virtualized environment.
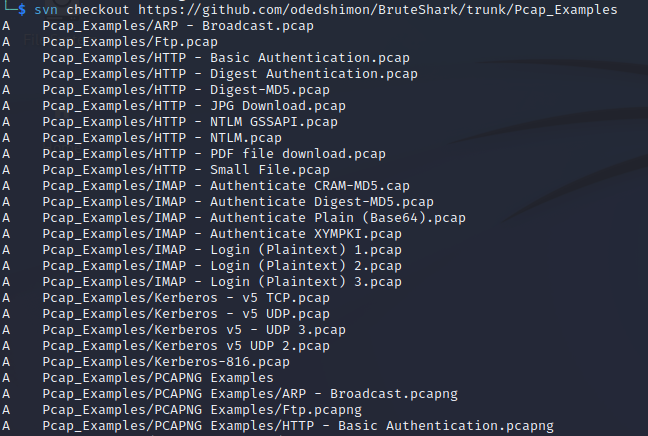
For the sample PCAP files, I used the ones provided by Oded on the BruteShark GitHub here.
You can download them using the command:
svn checkout https://github.com/odedshimon/BruteShark/trunk/Pcap_Examples
3. What is BruteShark?
Directly from Oded Shimon’s description:
“BruteShark is a Network Forensic Analysis Tool (NFAT) that performs deep processing and inspection of network traffic (mainly PCAP files, but is also capable of directly live capturing from a network interface). It includes: password extracting, building a network map, reconstruct TCP sessions, extract hashes of encrypted passwords and even convert them to a Hashcat format in order to perform an offline Brute Force attack.” -Oded Shimon.
So in other words we can extract files, credentials, build network diagrams, and reconstruct sessions from PCAP files and live capture of network traffic.
Today I will use the example PCAP files to perform a file extraction and credential extraction to briefly show the capabilities of BruteShark.
4. Why use BruteShark?
BruteShark allows a network administrator to analyze traffic for malicious activity, insecure communication methods, weak passwords, and find vulnerabilities in the networking configuration.
A penetration tester may use BruteShark to capture network traffic for offline extraction of credentials, build a network diagram, and extract files that may leak information.
5. How to use BruteShark?
Although Kali does offer a version of BruteShark I believe it is outdated so we are going to download the executable directly from Oded Shimon and run the executable manually.
Step 1:
Download sample PCAP files from BruteShark GitHub using
the following command:

svn checkout https://github.com/odedshimon/BruteShark/trunk/Pcap_Examples
Step 2:
Download BruteShark using wget.
wget https://github.com/odedshimon/BruteShark/releases/latest/download/BruteSharkCli

Step 3:
Change permissions to the executable file to make it executable.

chmod +x BruteSharkCLI

Step 4:
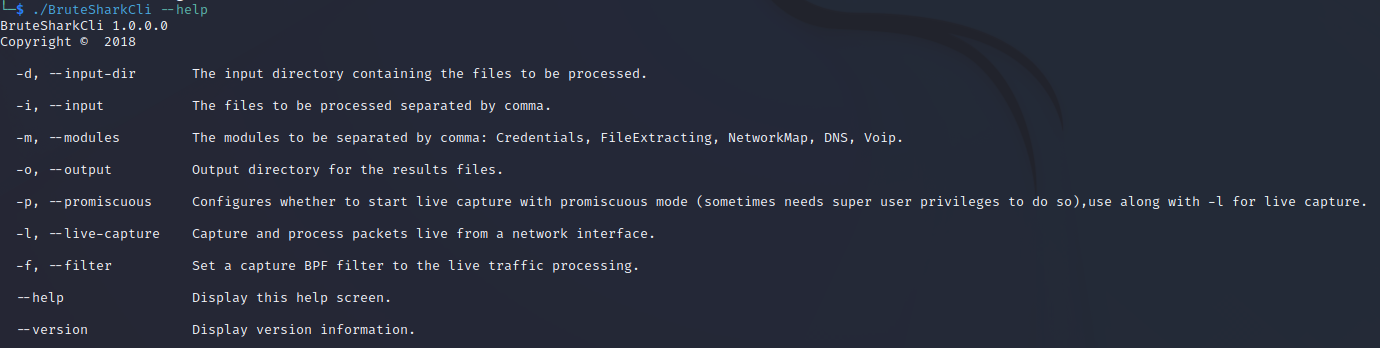
Checkout the BruteShark help page by entering the following command:
./BruteSharkCli --help
Step 5 (File Extraction):
I am using the PDF PCAP example: HTTP - PDF file download.pcap
Enter the following command to extract the PDF:
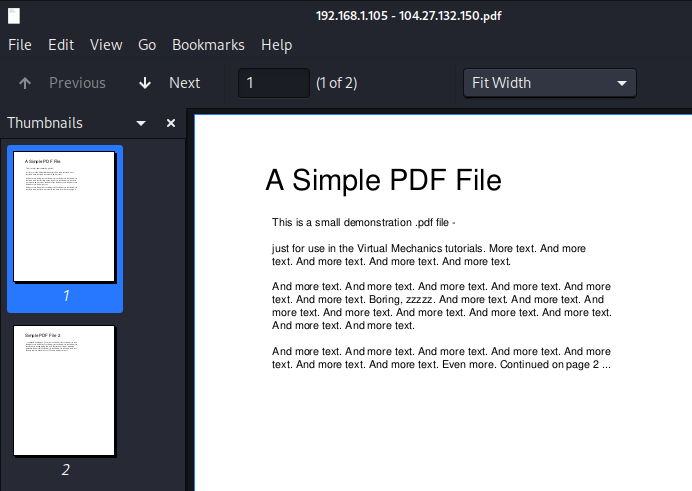
./BruteSharkCli -i Pcap_Examples/HTTP\ -\ PDF\ file\ download.pcap -m FileExtracting -o pdf
This command output the PDF file into the folder /pdf/Files/ where I could then view and interact with the PDF.


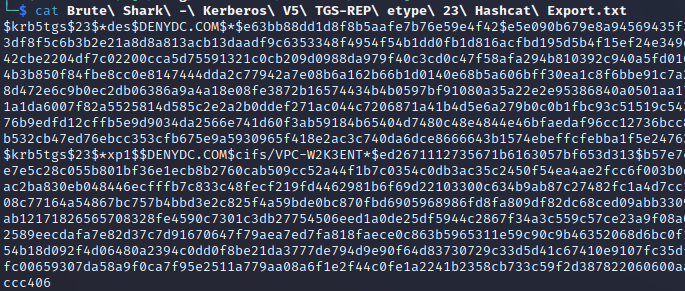
Step 6 (Kerberos Hashed Credential Extraction):
I am using the Kerberos PCAP example: Kerberos-816.pcap
Enter the following command to extract the Kerberos hashes credentials:
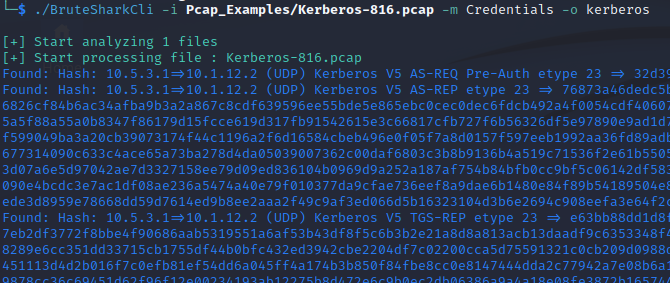
./BruteSharkCli -i Pcap_Examples/Kerberos-816.pcap -m Credentials -o kerberos
This command output the hashes into the folder kerberos/Hashes where I could later crack them offline.

6. Summary
BruteShark was created by Oded Shimon to perform network forensic analysis of PCAP files and live network traffic.
BruteShark can extract files, credentials, build network maps, and reconstruct sessions.
I hope you can play around with BruteShark and see what you can discover in your PCAP files or live network traffic.
If you are a Windows user and want to use BruteShark with a nice GUI check out the installer here:
https://github.com/odedshimon/BruteShark/releases/latest/download/BruteSharkDesktopInstaller_x64.msi
I hope you enjoyed this blog post.
Thanks for reading!
If you have suggestions for what tool to cover next, contact me!