1 . Introduction
2 . My Setup
3 . What is GoScan?
4 . Why use GoScan?
5 . How to use GoScan?
6 . Summary
This post is designed to introduce you to the tool GoScan.

1. Introduction
Welcome to the thirtieth blog post of 100 tools in 100 days.
Find GoScan here.
Marco Lancini developed GoScan and you can find his social profiles and content here:
LinkedIn
GitHub
Personal Website
Security Blog
2. My Setup
For running the GoScan tool, I used Kali Linux in a VMware Workstation 16 Player virtualized environment.
For my vulnerable host, I used the room SimpleCTF on TryHackMe here.
3. What is GoScan?
GoScan is a network scanner that is written in the Go language. It is fast, reliable, and performs its tasks in its own shell.
4. Why use GoScan?
If you need a network scanner that uses Nmap functionality, but also stores findings in an SQL database for future reference this is the tool for you.
If you are a CTF player or allowed noisy access as a penetration tester this may be the tool for you!
Most importantly, GoScan offers a lot of auto complete options to speed up your scanning process.
5. How to use GoScan?
GoScan is not native to Kali Linux so I will first show you how to install it.
I am going to follow the binary installation instructions provided on the GitHub page for GoScan here.
Step 1:
Ensure you have root permissions either as root (bad) or as a sudo user (good).

Use the following commands to get, and setup GoScan:
wget https://github.com/marco-lancini/goscan/releases/download/v2.4/goscan_2.4_linux_amd64.zip
unzip goscan_2.4_linux_amd64.zip
chmod +x goscan
sudo mv ./goscan /usr/local/bin/goscan
Step 2:
Now I am ready to run GoScan.
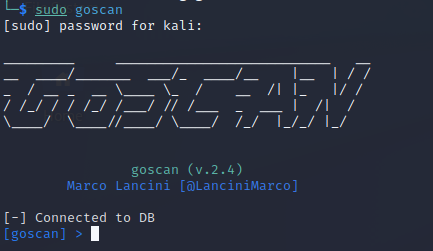
To do so ensure you use sudo when starting GoScan.
If you are not root then you will see the below error.
sudo goscan

GoScan will start in its own shell:
Step 3:
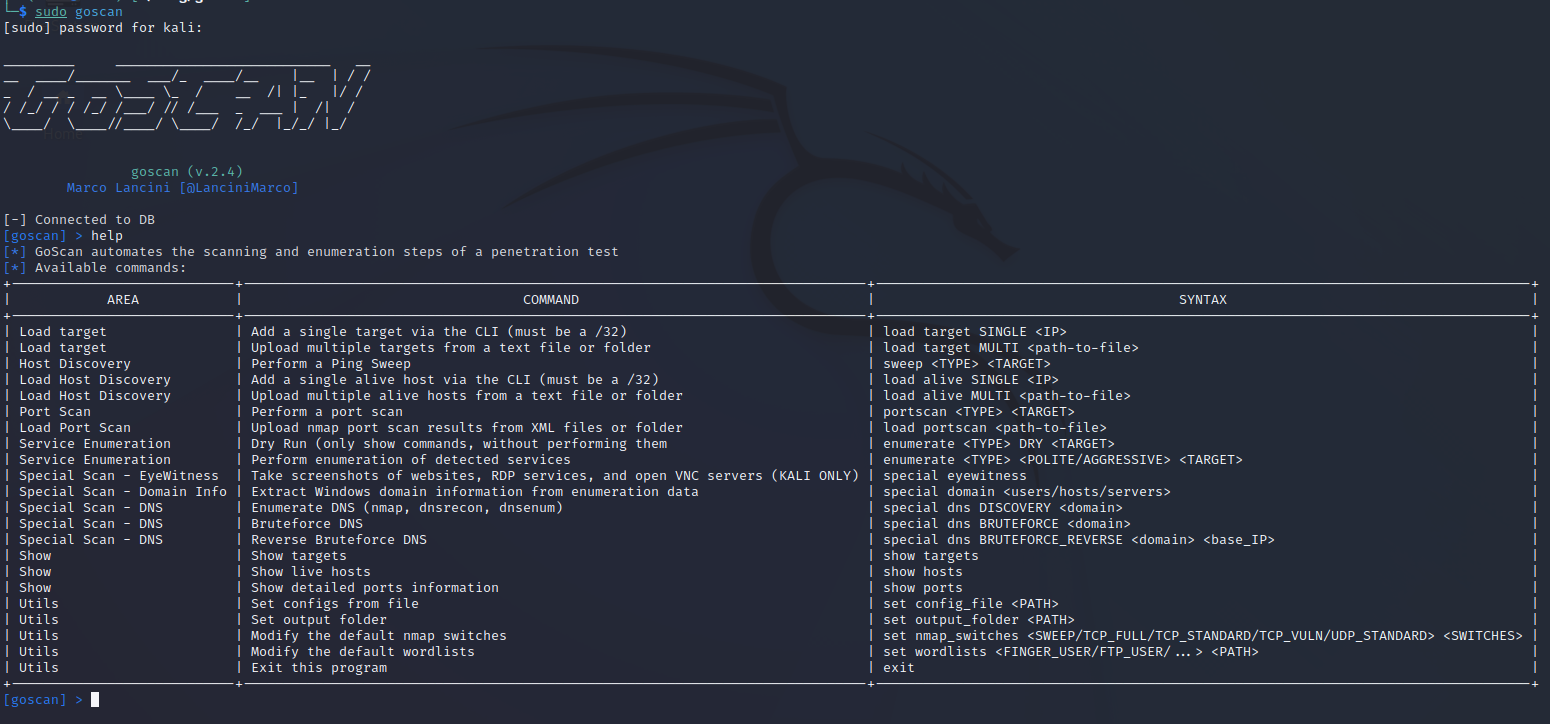
Once in the GoScan shell, you can type help to see the options.
Step 4:
To begin my scan I set my Load target variable to the single
TryHackMe IP discussed earlier.

load target SINGLE 10.10.230.16/32
One of the great aspects of GoScan is the auto-suggest function. See it live below:

Step 5:
I need to verify the host is alive by running a PING test:

sweep PING ALL

Note: some hosts will not respond to PING tests. <br>

Step 6:
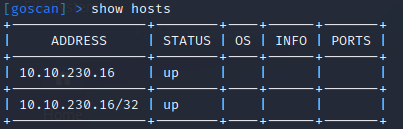
Next, I want to verify the host is up and ALIVE.
show hosts
Step 7:
Next, I need to load the alive host before performing the TCP scan.

load alive SINGLE 10.10.230.16/32

Step 8:
With the alive host set I can now perform a standard TCP scan:

portscan TCP-STANDARD 10.10.230.16

Step 9:
Once the standard TCP scan is complete I can view the hosts/ports again and see what was found.

show hosts

show ports

Step 10:
From the returned hosts results we can see that nmap found ports 21 and 80 open.

From here we can use the enumerate option to perform further analysis.
Additionally, you can use the dry option to show you the command GoScan would run before choosing that option.

enumerate FTP DRY 10.10.230.16

enumerate HTTP DRY 10.10.230.16


Having the option to see what nmap scans will run is a great option if you are not familiar with all of the nmap options. So this tool is not just for ease of use, but also can teach you nmap options that maybe you had not known of previously.
Another great aspect of this tool is that you can modify your nmap options and default wordlists. This gives you more flexibility during your enumeration and scans.
Finally, some additional options this tool offers are domain enumeration, DNS enumeration, bruteforce, and screenshotting websites, RDP services, and VNC servers source.
6. Summary
GoScan is a simple and easy to use command line tool which runs in its own shell within your terminal.
I like it as it offers auto-suggestion for each command as well as a simple and easy to use workflow.
Definitely check it out and check out other tools Marco has created at his GitHub.
I hope you enjoyed this blog post.
Thanks for reading!
If you have suggestions for what tool to cover next, contact me!