1 . Introduction
2 . My Setup
3 . What is Cutycapt?
4 . Why use Cutycapt?
5 . How to use Cutycapt?
6 . Summary
This post is designed to introduce you to the tool Cutycapt.
1. Introduction
Welcome to the twenty-fifth blog post of 100 tools in 100 days.
Find Cutycapt here: http://cutycapt.sourceforge.net/.
2. My Setup
For running the Cutycapt tool, I used Kali Linux in a VMware Workstation 16 Player virtualized environment.
3. What is Cutycapt?
If you read my post from day 16 on the tool Httrack here, then you are familiar with copying an entire website to your device for offline use.
Cutycapt takes a picture of an entire website and saves it in various formats (including PDF).
4. Why use Cutycapt?
Cutycapt works in the terminal as a command line tool, if you did not have a browser to take screenshots you could use Cutycapt to still capture a website screenshot and save it as your desired filetype.
Why take a screenshot of a website? If you are practicing OSINT skills this is a fantastic method for archiving websites to reference later as evidence. If you are a pentester you can use the screenshot to scan the website for data that automated tools might have missed. If you are making personal archives you can use this tool to save image versions of websites.
If you have access to Google Chrome or Firefox you can of course take a better screenshot using developer tools which I will show as a bonus step in section 5 of this blog post.
5. How to use Cutycapt?
Step 1:
To use Cutycapt open your terminal window and type:

cutycapt -h

This will open the help menu for Cutycapt.

Step 2:
I took a screenshot of the Microsoft windows website located at this URL:
https://www.microsoft.com/en-us/windows?r=1

I saved the file as a PDF.

Below is my command for Cutycapt:
cutycapt --min-width=1920 --min-height=1040 --url=https://www.microsoft.com/en-us/windows?r=1 --out=windows.pdf

I used the min width/height options to match my current screen size. But this is not necessary for Cutycapt to work.
Below is a screenshot of the PDF, you can see the exact PDF here.
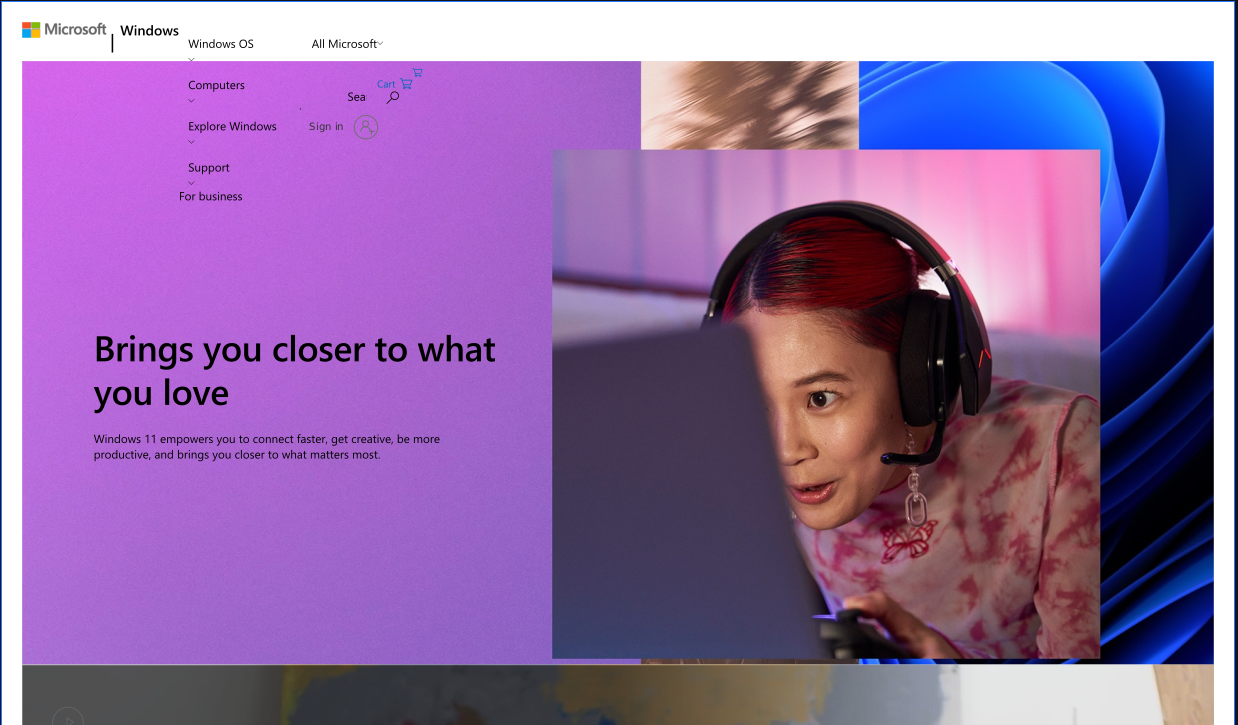
As you can see from the screenshot/PDF Cutycapt doesn’t always take great screenshots of websites that use dynamic sizing for devices today. Therefore, if you wanted to get a clean screenshot that matches what you see and you have Google Chrome read below.
Google Chrome Full Screenshot (bonus)
Bonus Step 1:

In Google Chrome press the following hotkeys to open developer options:

Ctrl + Shift + I
Bonus Step 2:

Once developer options have opened press the following
hotkeys to open the command mode:

Ctrl + Shift + P
Bonus Step 3:

Type screenshot and click "Capture full size screenshot"

This saves the entire webpage as a screenshot in .PNG format.
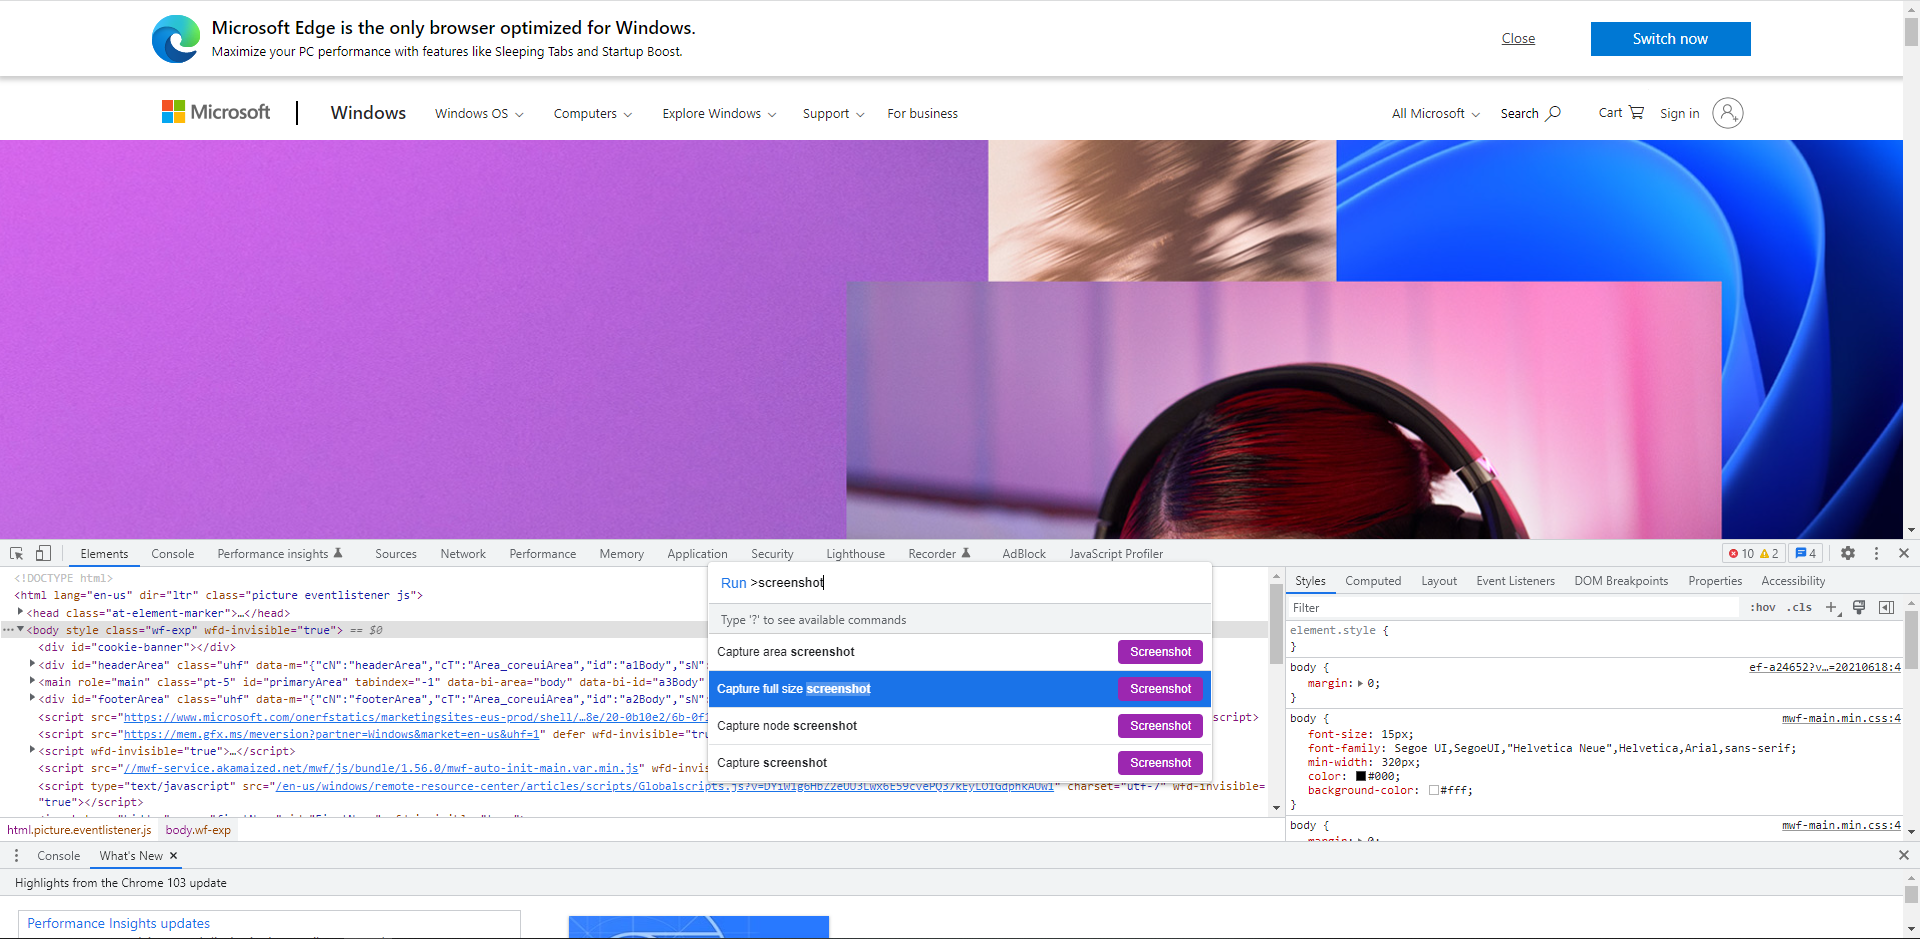
Here is a link to the Google Chrome screenshot .PNG file.
6. Summary
Cutycapt is a simple command line tool for taking screenshots of a website. It is limited and was built when websites didn’t adjust as dynamically for device screen sizes.
Therefore, if you need a cleaner screenshot of a website you can also use developer tools in Google Chrome or Firefox.
I hope you enjoyed this blog post.
Thanks for reading!
If you have suggestions for what tool to cover next, contact me!