1 . Introduction
2 . My Setup
3 . What is Legion?
4 . Why use Legion?
5 . How to use Legion?
6 . Summary
This post is designed to teach you what the tool Legion accomplishes and how to use it.
1. Introduction
Welcome to the first blog post of 100 tools in 100 days.
In this post and concurrent posts, I will introduce you to a tool in Kali or Parrot Linux.
I will discuss use cases for the tool.
Finally, I will show a quick how-to to get you started using it.
2. My Setup
For running the Legion tool, I used Kali Linux in a virtualized Host & NAT enabled VmWare Workstation 16 Player virtualized environment.
For the victim device, I used Metasploitable2 in a virtualized Host-Only enabled VmWare Workstation 16 Player virtualized environment.
3. What is Legion?
“Legion is an open source, easy-to-use, super-extensible and semi-automated network penetration testing tool that aids in discovery, reconnaissance and exploitation of information systems.” - GoVanguard
Legion combines multiple scanning techniques to discover, enumerate, and penetrate information systems.
Legion offers a graphical user interface that makes it quick and easy to use for any skill level.
The interface allows for advanced features where a user can modify, add or remove scripts and functions of each scan.
4. Why use Legion?
Convenience! This tool combines so many other tools into a nearly one-click package for conducting recon and exploitation on systems.
5. How to use Legion?
Set up your victim device:
Step 1: Setup a device to attack on your private network. Annotate its IP address for later!
Setup attack device:
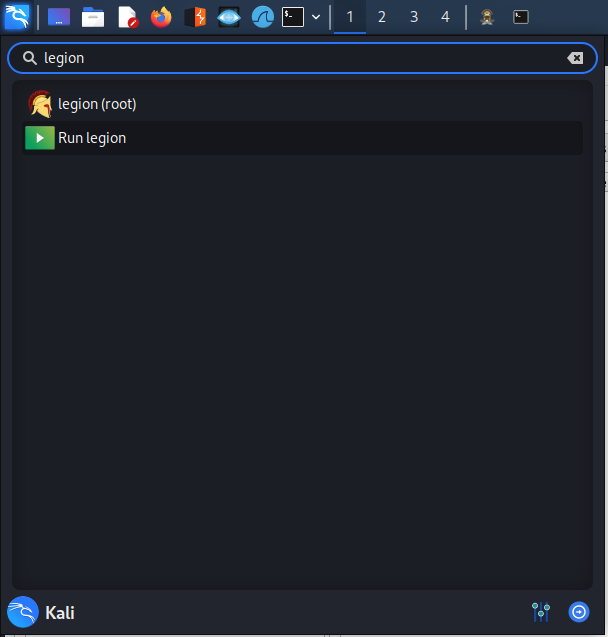
Step 2: Open Kali Linux and navigate to the application menu and type "Legion" in the search bar.
Click Legion and enter your sudo password if you are not root.
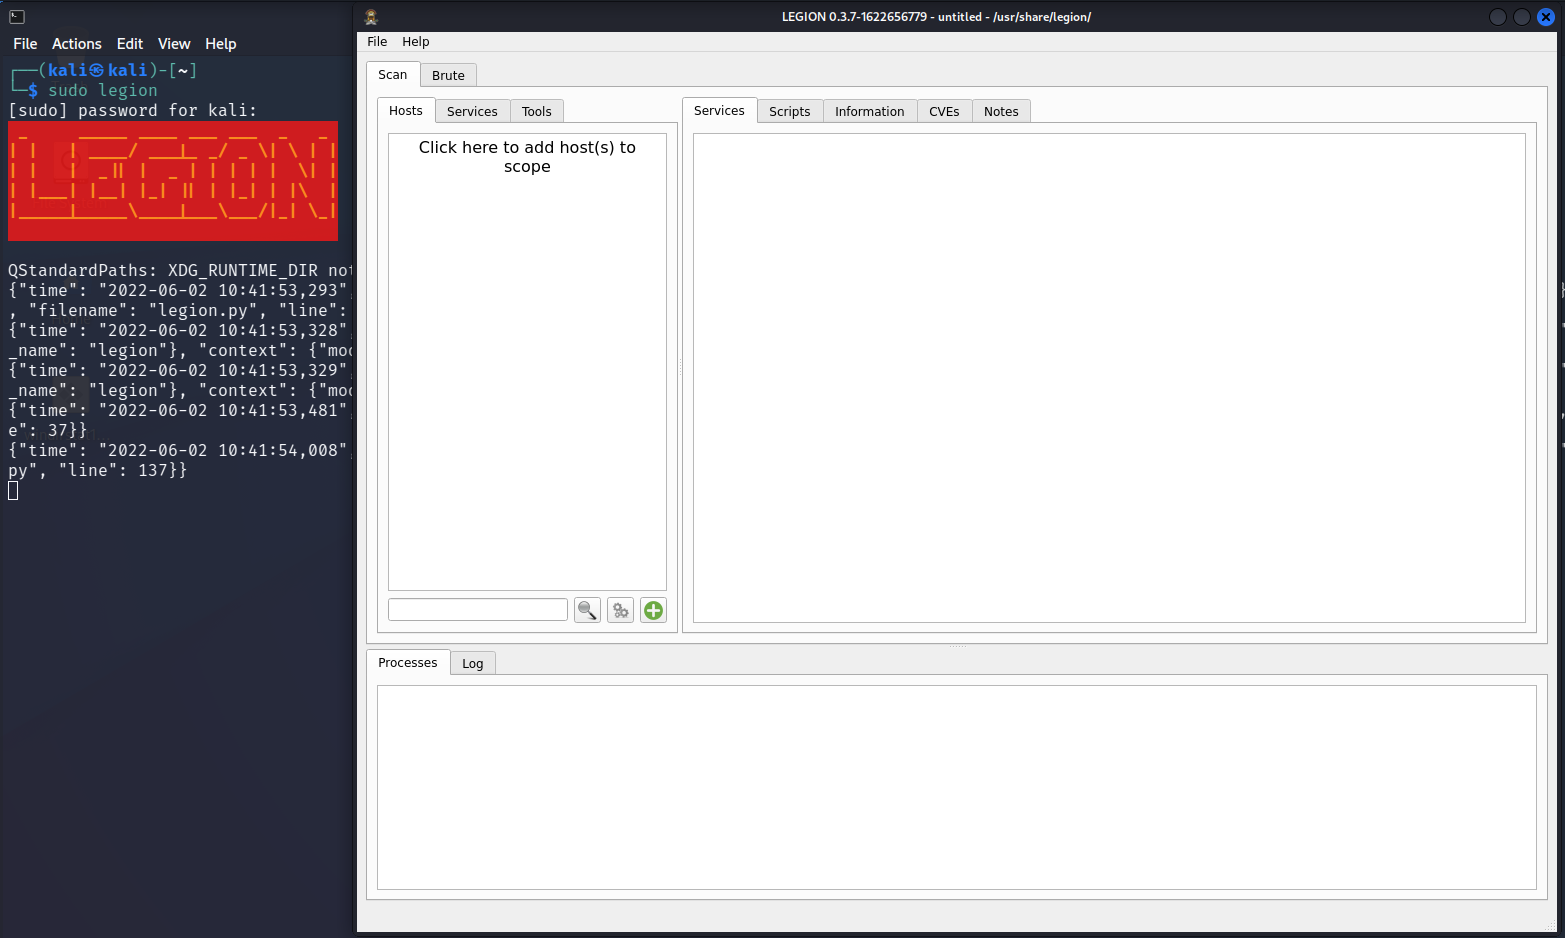
Step 3: Legion should have opened its graphical user interface where you can interact with it.
Click in the space where it says "Click here to add host(s) to scope",
this will open a dialog where you can choose options and enter address targets.
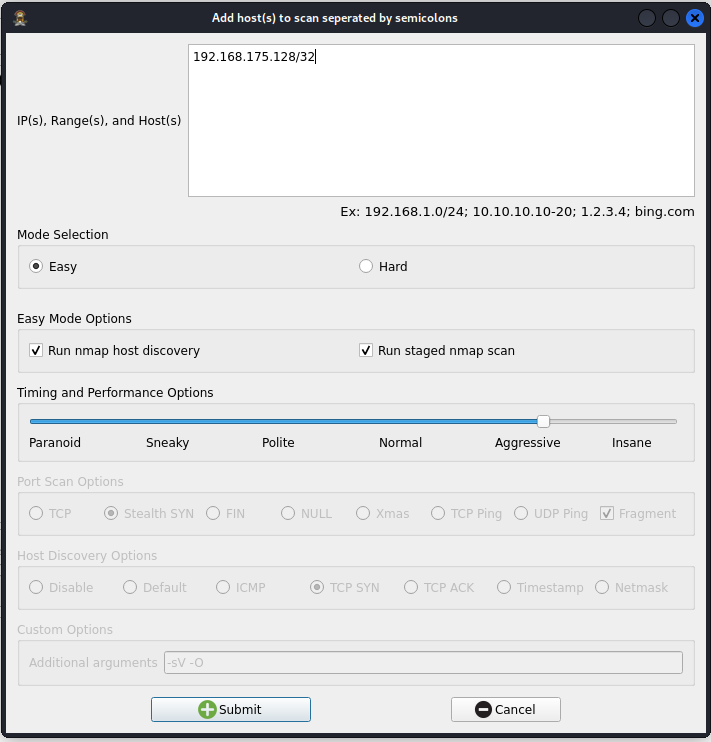
Step 4: Enter the IP address of your victim device chosen in step 1 in the "Ip(s), Range(s), and Host(s) box.

*Note* I chose a CIDR of /32 to ensure the only device scanned on the network was the victim device.

Click Submit!
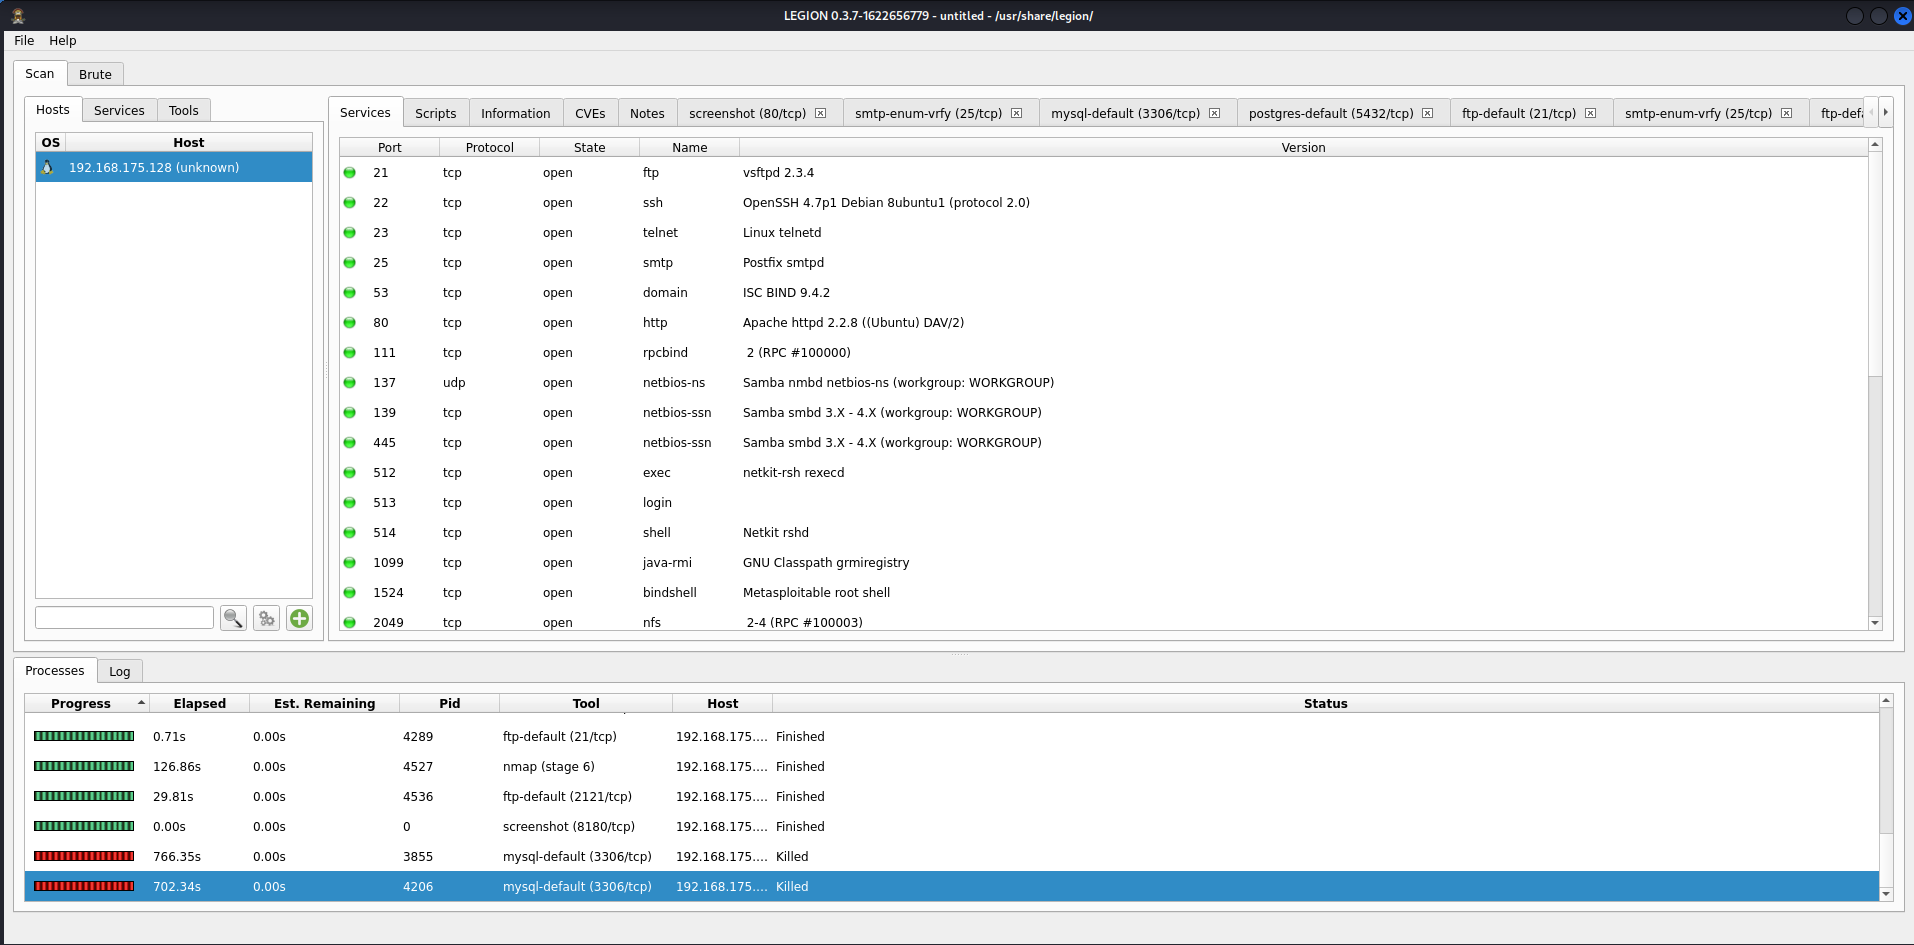
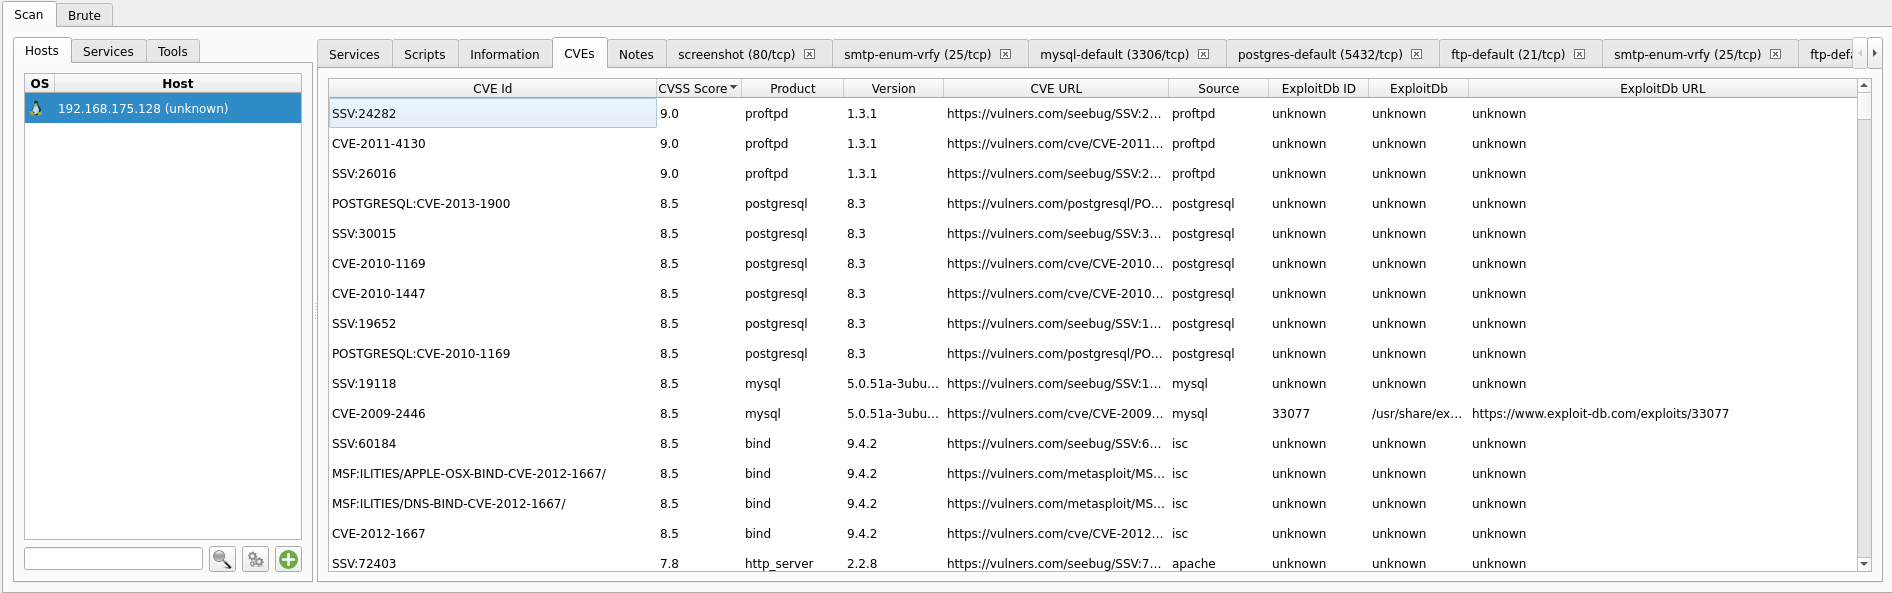
Step 5: Let the scan run and once finished you should have results displayed of:
-types of services found on the victim
-scripts used and their results
-information on the device and OS
-CVEs that may be present
-screenshots of any sites found
-a tab for each script ran and it's results.

6. Summary
I covered a very brief and basic view of Legion from GoVanguard.
We discussed some of its uses, how to use it at a basic level and why to use it.
This brief post barely touches the capabilities of Legion, so go check it out and try it out for yourself. More resources can be found on the GoVanguard GitHub here and from the GoVanguard website here.
Thanks for reading!