1 . Introduction
2 . My Setup
3 . What is asciinema?
4 . Why use asciinema?
5 . How to use asciinema?
6 . Summary
This post is designed to introduce you to the tool asciinema.

1. Introduction
Welcome to the thirty-third blog post of 100 tools in 100 days.
Find asciinema here.
2. My Setup
For running the asciinema tool, I used Kali Linux in a VMware Workstation 16 Player virtualized environment.
3. What is asciinema?
asciinema is a terminal recording tool.
asciinema records your commands and typing and saves it as a file for playback.
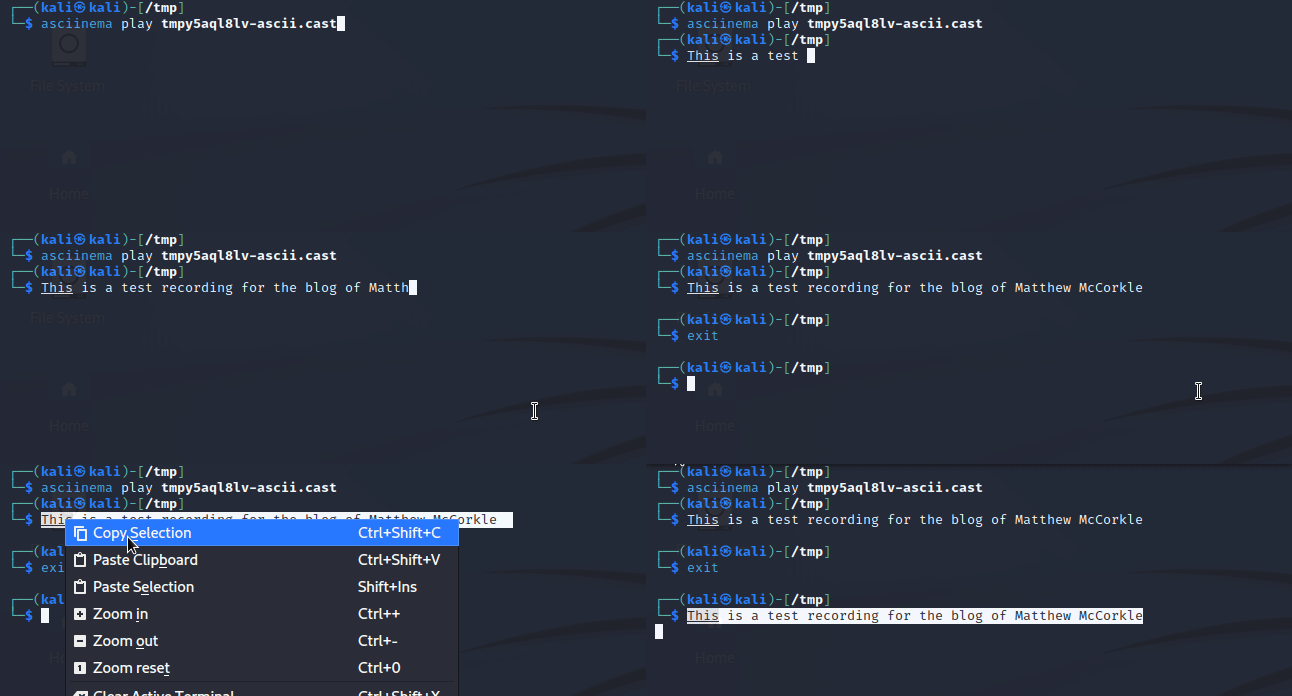
What is really great about this tool is that when you play the recording back, it plays it in your terminal where you can copy commands and words as recorded.
4. Why use asciinema?
Education! You can record your command line work and then send it to others for educational purposes.
Record Keeping! You can use this to create a record of work completed for your own records or submission to an employer, etc.
Documenting penetration test attacks! You can use this tool to document your commands used during penetration testing. This can then be used in a digital report format for your client. Additionally, you can use this recording for junior testers on your team to reference and learn from during their testing.
Evidence! You can use this tool to create evidence recordings ( of course see if your jurisdiction allows this as evidence).
5. How to use asciinema?
First, you need to install asciinema onto your device. There are many ways to do that listed here.
Because I am using Debian Linux (Kali runs on Debian) I am going to use the apt command.
Step 0 (optional):
If you want to upload your asciinema recordings register for an account at:

https://asciinema.org/login/new
Step 1:
Run the following command to download and install the package:

sudo apt-get install asciinema
Step 2 (optional):
If you want to authorize your recordings to upload to asciinema.org type:

asciinema auth

Follow the terminal prompt and copy & paste the website
into a browser where you are logged in to asciinema.org

Step 2:
To being recording your terminal type:

asciinema rec

Step 3:
Stop recording by typing:

exit

This will prompt whether you want to save the recording locally
or to your online asciinema.org account.

Step 4a (Local save):
I chose to save my test recording locally.
I did this by typing Ctrl + C at the end of the recording as prompted.
Step 4b (Playing local save):
asciinema will tell you exactly where it saved your recording.
To view the recording in your terminal type:

asciinema play /path/to/your/recording

The best part is that this playback allows for copy and pasting of the commands as the recording takes place in a pseudo-terminal.

Step 5a (Remote save on asciinema.org):
You need to have made an account at asciinema.org and run the authorization command from step 2.

After you type exit to stop recording the prompt will ask if you want to
save to your asciinema.org account. If you press <enter> then it will
save online and display the URL where you can access the save. This
saved recording is private and uploaded via HTTPS.
If you upload the recording to your asciinema.org account you can then share the link (while it remains private for searching on asciinema.org).
You could embed the recording as you see below.
You can even play the recording from the web into your own terminal using the following command:
asciinema play https://asciinema.org/a/pathtoyourvideo

6. Summary
asciinema is a powerful pseudo-terminal recording tool.
This tool allows a user to record all of the input in their terminal and outputs the recording as a file which can be viewed, referenced, copied, etc in a terminal window.
Additionally, you can upload the recording to an asciienma.org account where you could share or download the playback directly into your terminal.
I hope you enjoyed this blog post.
Thanks for reading!
If you have suggestions for what tool to cover next, contact me!